HOW TO STREAM PINBALL
Work In Progress / Soft Launch.
CAMERAS | MICROPHONES | ACCESSORIES | STANDS | LIGHTING | SOFTWARE | COMPUTER | SETUPS | LOCATION | NOTES
As Pinball’s popularity grows, more and more people want a way to make this hobby their own.
Podcasts and blogs are some of the great ways folks share their love and knowledge of this thing of ours.
As technology has improved, live-streaming pinball has become a norm and a go-to now for tournaments and game reveals alike!
If you’ve wanted to start your own pinball live-stream, you may not know where to start. There have been countless hurdles over the years to overcome to make pinball streaming easy and cheap for all to produce.
Having been a veteran of several years of streaming, pioneering budget rigs, and even working with some of the internet’s biggest platforms to make pinball an actual category, I’m here to share what I know.
This guide will show you different rigs, with varying gear, for almost any budget.
Let’s get started!

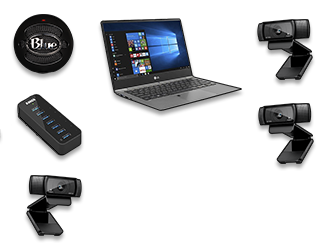
Cameras:
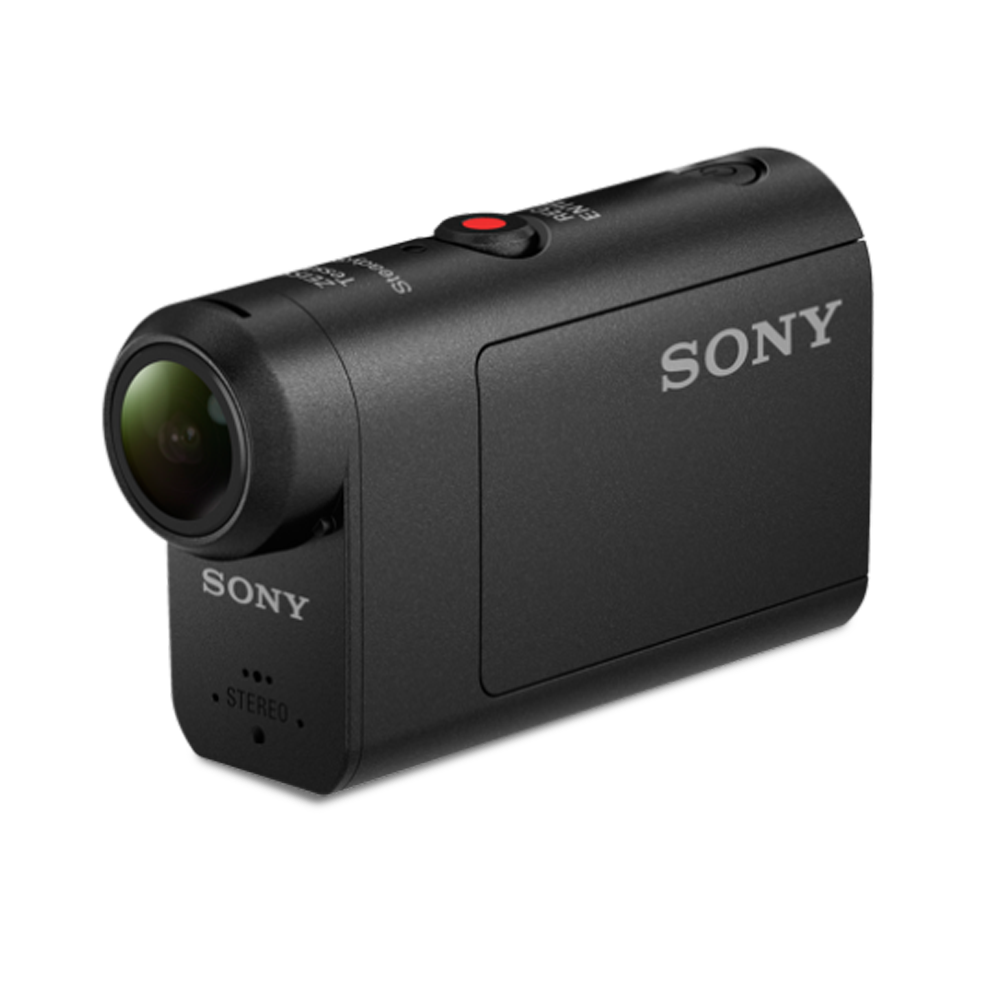
SONY ZV-1: https://amzn.to/3eoxM26

This has been the best camera I have EVER worked with in my time as a streamer, but comes in at a fairly high price point.
The lens on this camera is amazing, the picture quality is through the roof, and the option for a mic output is perfect to add more mic sources, depending on what your setup looks like.
I cant endorse this camera enough, but again, this shouldn’t be the camera you buy if you’re just getting started. Start low, know what you want, and upgrade your gear gradually.
Logitech C922: https://amzn.to/2JQnHL9

This is the next step up from the C920. This camera boasts 60fps but comes at a cost since the picture looks muddy in any resolution. Perfect for playfield cameras if you want silky 60fps on a budget.
Pros:
-Cheap
-Plug-N-Play
-Built-in-mic
-Tripod ready
Cons:
-60FPS Only works properly with 720p resolution on default settings.
-So-So quality
-Mic quality is okay
-USB 2 Bandwidth Hog
-Requires some setup to make color/gain look good
Sony Handycam: https://amzn.to/2tl185V

I ran with these cameras FOREVER. Amazing quality with an optical zoom allows flexibility with distance from camera with no loss to picture. The sensor on these camcorders also take the guesswork out of color/exposure/white-balance etc so everything looks great without stressing.
I run these at 720P/60fps. The 405 model works exactly the same.
Pros:
-Amazing quality
-Optical zoom
-Tripod ready
-Auto balance/gain/color
-60+ FPS
Cons:
-More expensive than webcams (Obviously)
-Requires capture card
Action Cameras/DSLR Cameras/Other Camcorders
Many different cameras can be used for streaming from photography DSLRs to your standard GoPro. Each have their own advantages and disadvantages, price points, and limitations. If you can get an HDMI signal out, you can use it with a capture card!


Microphones:
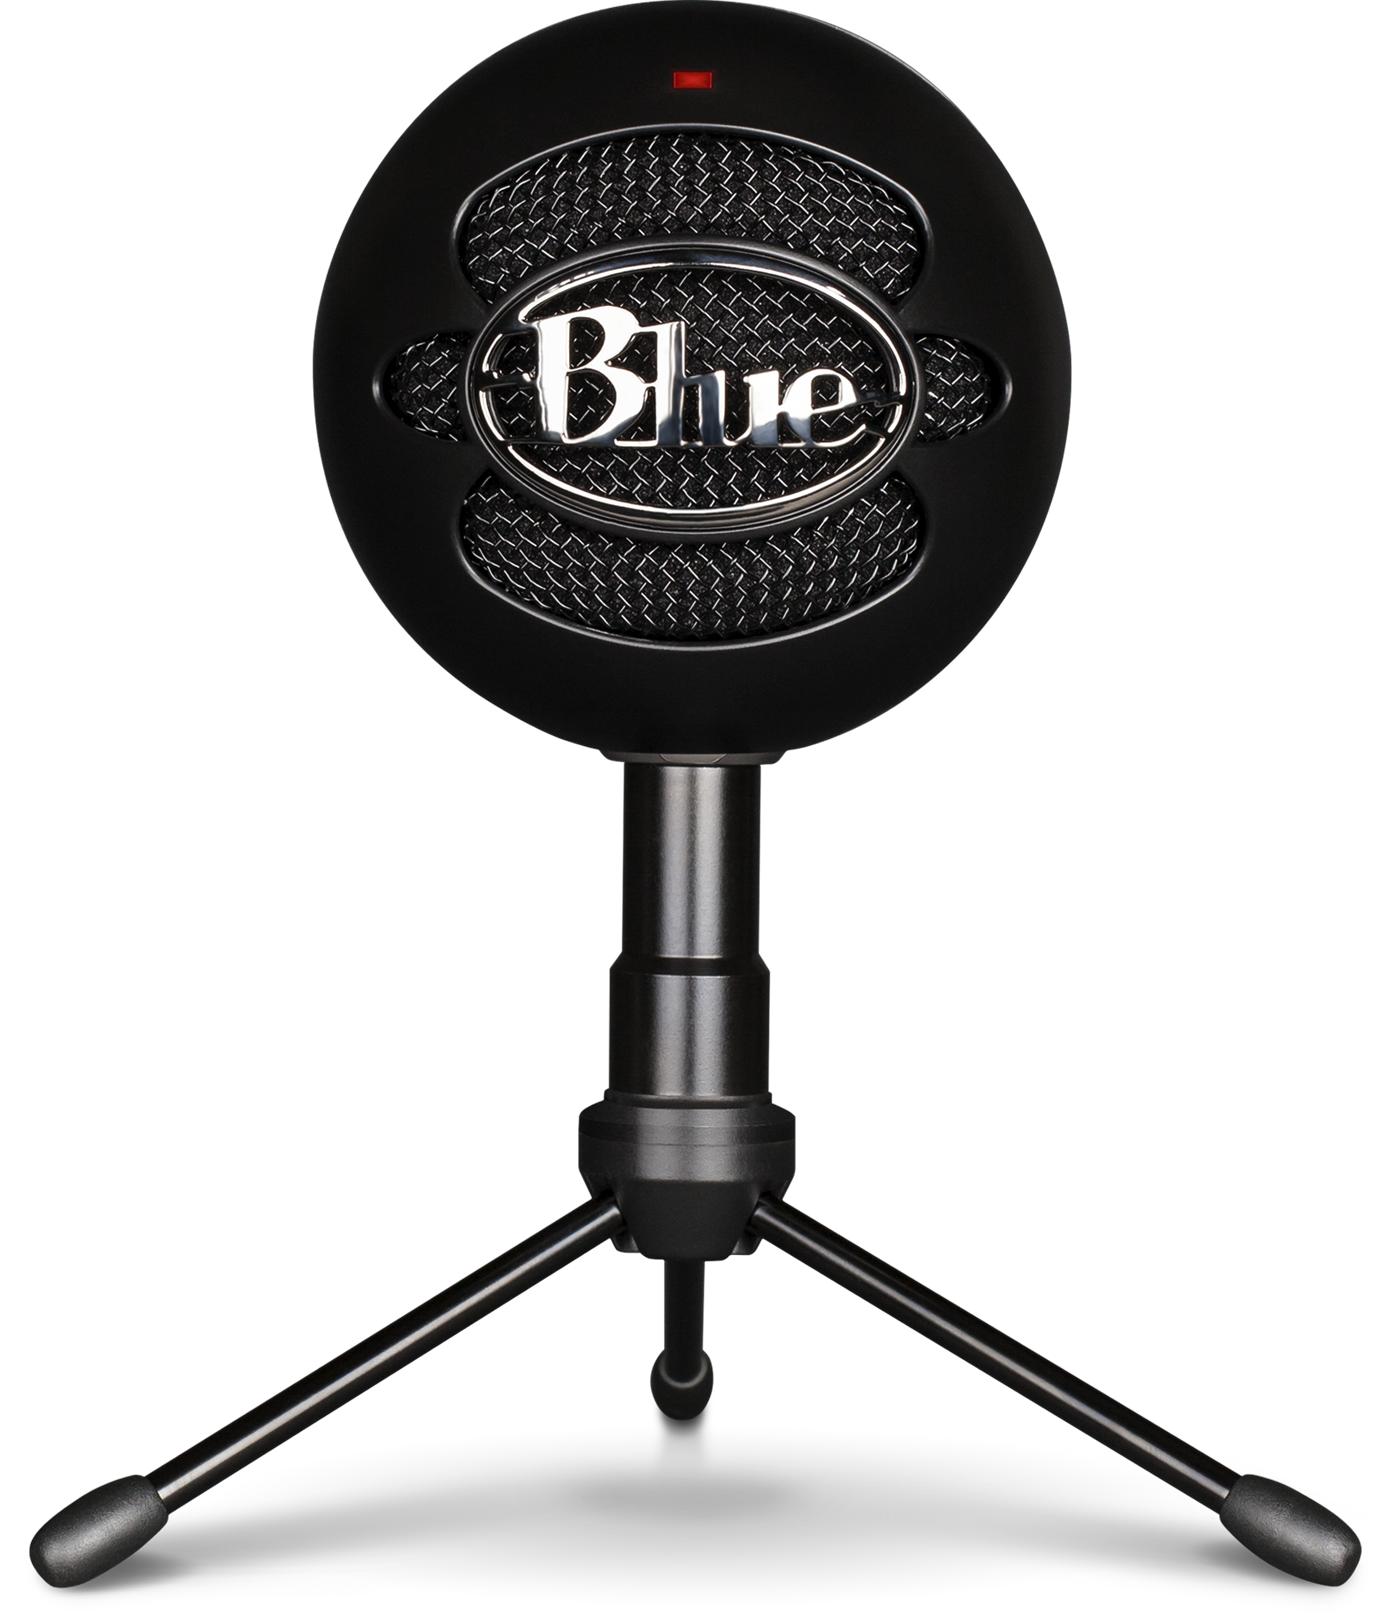
Blue Snowball https://amzn.to/2I352WC
This tried and true mic can do no wrong. This was my go-to forever. This mic not only sounds great, it sounds great in a crowded room and can still pick you and the game sounds up.
Not to mention the durability of this mic is off the charts. I’ve dropped and rolled this thing in many bars and basements and still works like a charm.
-Great sound quality
-Durable
-USB 1+
-Mic-Stand ready
-Comes with a small stand
-Low USB bandwidth consumption

Audio Technica AT-2020 USB https://amzn.to/2MzGRCF
In my never-ending quest to make my show quality better, I bought this mic on a recommendation from another video game streamer. It makes you sound amazing, and can still perform very well in a crowded bar while keeping you and the game clear.
-Amazing sound quality
-USB 2+
-Mic-Stand ready
-Comes with a small stand
-Low USB bandwidth consumption
Built-in mics:
If you’re on a budget, fear not. Most, if not all, cameras have built-in microphones. They may not sound incredible but they get the job done. The cameras on the Logitech c92Xs I have used in a pinch a handful of times!
Accessories:
Elgato Cam Link:
https://amzn.to/2t8roBu
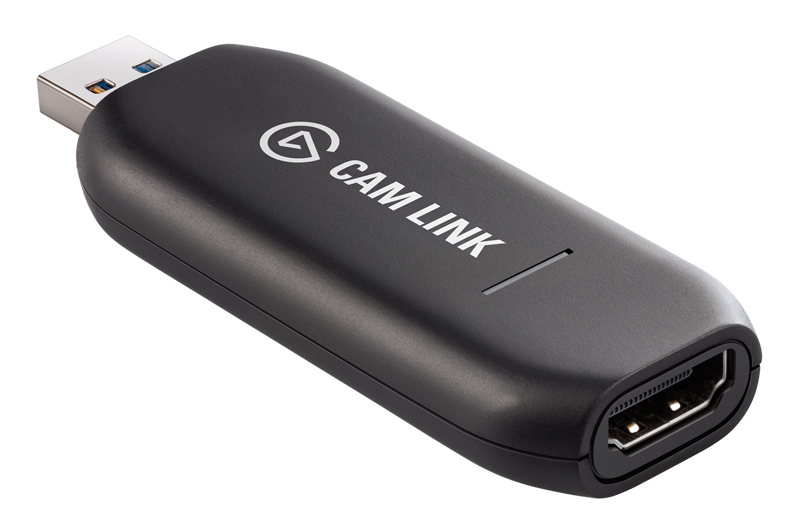
I use these little guys to capture any HDMI feeds I need sent to the computer like my cameras. These take the HDMI feed and convert it to a USB3 signal to use for your stream.
*There are many types of internal or external capture cards, you typically can’t go wrong. Older capture cards may have a delay that you need to compensate for by playing with the delay on the rest of your cameras and mic to sync everything up. Some cards like the Elgato HD60S https://amzn.to/2ImZaHV take an HDMI feed, branch it off to a USB signal for you to use, and still allow the HDMI signal to carry on to its original destination.

THUNDERBOLT PCI EXPANSION Eclosure:
https://amzn.to/3SaMaJr
If you happen to be using a laptop for your streaming, there is only so much bandwidth the USB ports can handle with all the webcams, microphones, and capture cards running at one time.
This device allows the use of an internal capture card, but plugged into a laptop’s Thunderbolt port. Adding a Black Magic 4-input capture card, or and Elgato Camlink Pro capture card into this works wonders for running 4 high-end camera inputs at once!

BLACK MAGIC QUAD RECORDER:
https://amzn.to/3rPXKi8
This is one of the many cards out there that record HDMI inputs. If you have a PC, install it, but if you happen to have a laptop, you need the above enclosure to operate this.
This allows us 4 HDMI inputs from any sources, more notably your cameras, and even allows for audio passthrough from those cameras that might have microphones.
This card is fairly expensive, but does take a load off your USB bandwidth.
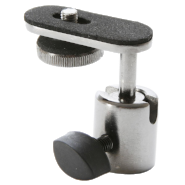
Camera Mic Stand Adapter: https://amzn.to/2tqPWWc
There are any number of “Mic Stand Camera Adapters” so take your pick. This is the one I use to attach my camera to the end of the mic boom to place over the playfield.

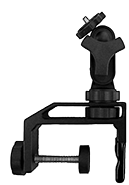
Adjustable Extended Camera Clamp: https://amzn.to/2tnU3me
This bad boy works wonders for everything. It can hold cameras, lights, you name it. AND, you can clamp clamps to this clamp with a clamp!

Arkon Camera Clamp Mount https://amzn.to/2J80DC0
While the above clamp is good, these are the camera clamps I swear by. VERY sturdy, can bend in any direction, and has a more (In my mind) secure clamp.
These do come with a few faults though. Bending too many times will result in a break. (Only broke 2 in over 3 years), and the pads for the clap tend to fall off, but you can just put them back on.
The way they let you clip and unclip a camera though, is a lifesaver when switching gear around!
Small Camera Clamp: https://amzn.to/2Mms9hc
This little guy is perfect for attaching a camera quickly to anything to get an angle. I typically use this on my mic stand to hold my DMD/Score/LCD cam.

Foam Windscreen for AT2020 Mic: https://amzn.to/2MTJyz6
A pop/wind filter is a must for almost any microphone. This is a filter for the Audio Technica AT2020USB.
Stands:

Mic Stand: https://amzn.to/2MlLCPk
These are the my setup’s bread and butter. I use these mic stands to hold my cameras and microphone. I use these for all of my mobile location work, but they work great at home as well since they are easy to move around.
Attach one camera (With an adapter -see accessories-) to the end of the stand and boom it out over the playfield. Then with a camera clamp of your choice, attach a camera for a face cam.
I use a second one near the player to hold the mic, and another clamp on that stand, to point a camera at the DMD/Score/Screen.
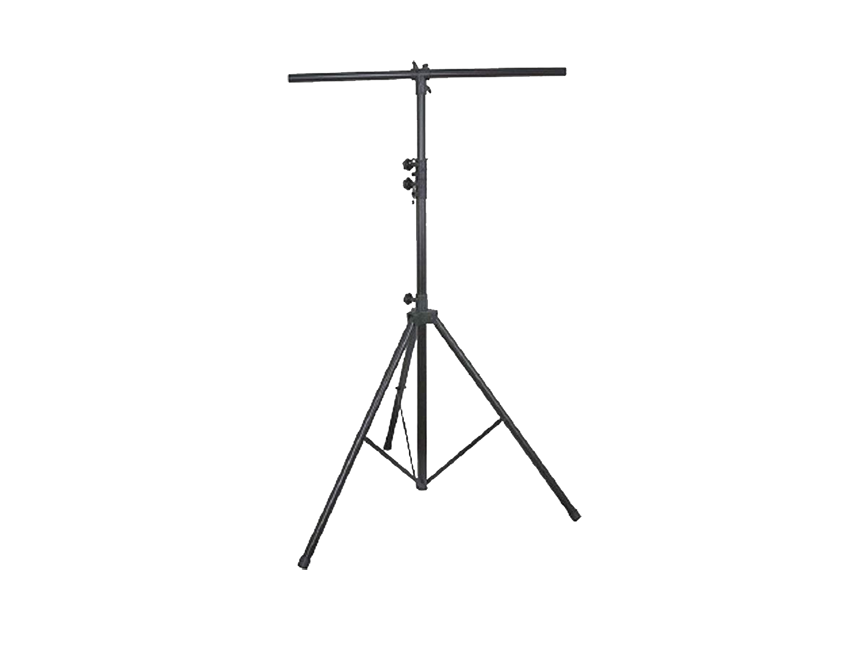
Monoprice Lighting Stand: https://amzn.to/2IouHJh
I keep these in the studio set up between machines to hold cameras/lights over games I know are not going to be moved. This is for a more permanent rig that isn't going to be moved around much if at all.
VERY durable, and can be used to set up over 2 games at once if you have the gear for such a rig.
Invest in a Powerstrip, Power extension cable, USB3 cables, and some Velcro wire management strips.
A note on USB 2/3 extension cables, go for the "Amazon Basics" brand cables, they work great and aren't terribly expensive. For longer "powered/active" USB 2 extensions, there are a lot of great options. I've used several brands over the years, and all have worked as intended. You'll want a "powered/active" USB 2 cable if the signal has to travel further than 20 feet.
Lighting:
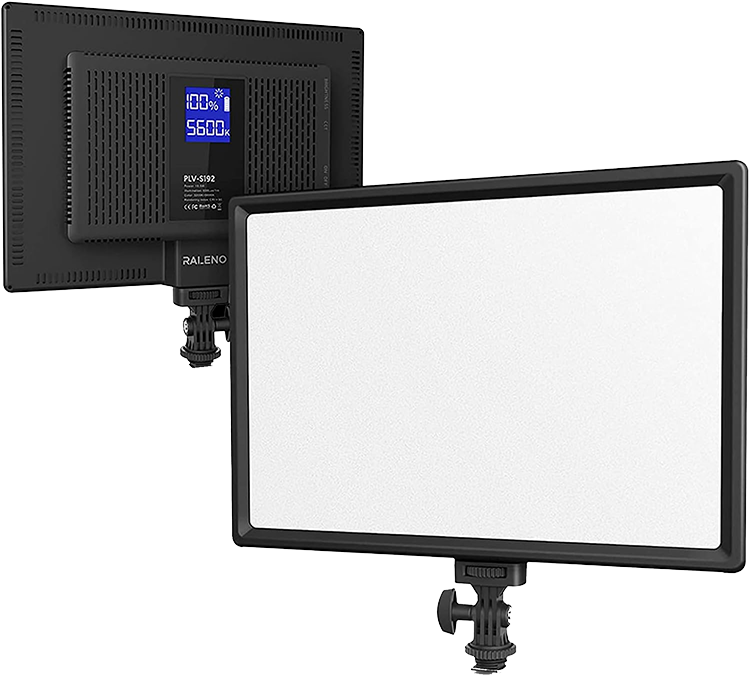
LED Lights: https://amzn.to/3CvcibN
Remember, lighting is what makes or breaks a stream. I don’t care how beautiful the room lighting is, the game lighting, etc. USE MORE LIGHTS! I aim one of these at the playfield on every game I stream.
*Lighting is perhaps the most important part of live-streaming pinball and where most beginners fall short. I cannot stress enough how important this is to get right.
Software:

As of writing this, there are only a few major streaming packages out there. There are dozens for sure, but only two have the most support online to help you hit the ground running.
I reccomend you get acclimated with a lot of them to see which package works best for your needs and setup!
*I usually have both installed. The reason being, sometimes one gets an update that breaks it for a while, so it’s good to have a backup.
OBS - Open Broadcasting Software - https://obsproject.com
-Mac or PC
-Free
-Straight-Forward
-Medium learning curve
-Used by most major streamers
-Tons of great online support
-Minimal hit to the CPU
XSplit - https://www.xsplit.com/#broadcaster
-PC only
-Subscription based, but free to start
-Straight-Forward
-Low learning curve
-Great Interface
-Handles inputs/cameras in a way that can be beneficial if they aren't acting right.
Computer:

Streaming Pinball isn’t like streaming anything else. Your whole setup requires only 2 things from the machine you are using. A decent processor, and enough USB ports for all your gear.
You want at least 3 USB ports (You might be able to work with less but it will be a struggle), and a decent i7 or equivalent processor.
My slowest computer is a laptop coming in at an i7-6700HQ @ 2.60 GHz with USB2 ports, and this worked wonders for an all c920/snowball rig. The PC cost me $500 new.
Setups/Rigs
Below are some rigs you can create, to get that perfect stream, in any environment!
Ultra low BUDGET with 2 cams (Optional no Xtra mic)

Laptop with 2+ USB2 Ports
2X Logitech C920: https://amzn.to/2tmthJZ
1x Blue Snowball https://amzn.to/2I352WC
(Or use c920’s mic)
1X Powered USB3 Hub https://amzn.to/2K3VtIz
(If you dont have enough on-board ports)
LED Lights: https://amzn.to/2lxezMT (or equivalent)
Small Camera Clamp: https://amzn.to/2Mms9hc (or equivalent)
1X Mic Stand: https://amzn.to/2MlLCPk (2X if you have a mic)
1X Camera Mic Stand Adapter: https://amzn.to/2tqPWWc
Low Budget/USB2 Rig : GEAR
Laptop with 3 USB2 Ports
3X Logitech C920: https://amzn.to/2tmthJZ
1x Blue Snowball https://amzn.to/2I352WC
(Or use c920’s mic)
1X Powered USB3 Hub https://amzn.to/2K3VtIz (or equivalent)
LED Lights: https://amzn.to/2lxezMT (or equivalent)
Small Camera Clamp: https://amzn.to/2Mms9hc (or equivalent)
2X Mic Stand: https://amzn.to/2MlLCPk
1X Camera Mic Stand Adapter: https://amzn.to/2tqPWWc
Medium Budget/USB2/3 Rig

Laptop with 3 USB2/3 Ports
2X Logitech C920: https://amzn.to/2tmthJZ
1X Logitech C922: https://amzn.to/2JQnHL9 (For Playfield 60fps)
1x Blue Snowball https://amzn.to/2I352WC
(Or use c92X’s mic)
1X Powered USB3 Hub https://amzn.to/2K3VtIz (or equivalent)
LED Lights: https://amzn.to/2lxezMT (or equivalent)
Small Camera Clamp: https://amzn.to/2Mms9hc (or equivalent)
2X Mic Stand: https://amzn.to/2MlLCPk
1X Camera Mic Stand Adapter: https://amzn.to/2tqPWWc
Large Budget/USB3 Rig

Laptop with 3+ USB3 Ports
1x Sony Handycam: https://amzn.to/2tl185V (For Playfield)
1x Elgato Cam Link https://amzn.to/2t8roBu
(To capture camcorder)
2X Logitech C922: https://amzn.to/2JQnHL9 (For DMD and Face 60fps)
(You can use a c920 instead of this and it works just fine but at 30fps)
1x Blue Snowball https://amzn.to/2I352WC
1X Powered USB3 Hub https://amzn.to/2K3VtIz (or equivalent)
LED Lights: https://amzn.to/2lxezMT (or equivalent)
Small Camera Clamp: https://amzn.to/2Mms9hc (or equivalent)
2X Mic Stand: https://amzn.to/2MlLCPk
1X Camera Mic Stand Adapter: https://amzn.to/2tqPWWc
My PREVIOUS Rig

Laptop with 3+ USB3 Ports
2x Sony Handycam: https://amzn.to/2tl185V (For Playfield and Face)
2x Elgato Cam Link https://amzn.to/2t8roBu (To capture camcorders)
1X Logitech C922: https://amzn.to/2JQnHL9 (For DMD 60fps)
(You can use a c920 instead of this and it works just fine but at 30fps)
Audio Technica AT-2020 USB https://amzn.to/2MzGRCF
1X Powered USB3 Hub https://amzn.to/2K3VtIz
LED Lights: https://amzn.to/2lxezMT
Small Camera Clamp: https://amzn.to/2Mms9hc
2X Mic Stand: https://amzn.to/2MlLCPk
1X Camera Mic Stand Adapter: https://amzn.to/2tqPWWc
1X Adjustable Extended Camera Clamp: https://amzn.to/2tnU3me
**My CURRENT Rig**
Laptop with 3+ USB3 Ports and Thunderbolt Port
1x Startech PCI Expansion Enclosure: https://amzn.to/3SaMaJr
1x Black Magic 4-input Capture Card: https://amzn.to/3rPXKi8
2x Sony ZV-1: https://amzn.to/3eoxM26 (For Playfield and Face)
1x GoPro: (I use this for older games to capture scores, use whatever camera you like)
1x Elgato 4K Cam Link https://amzn.to/2t8roBu (To capture Screens)
Audio Technica AT-2020 USB https://amzn.to/2MzGRCF
3x Panel Lights: https://amzn.to/3CvcibN (For face, game, and fill)

My MOBILE PHONE RIG
Iphone and Android: Streamlabs Mobile App
Selfie tripod: The one I swear by.
Wide-angle lens. (Depends on your phone model)
Battery when mobile: Anker Battery
You can purchase a small ring light as well, but that makes you stand out like crazy in the wild. :P
LOCATION STREAMING
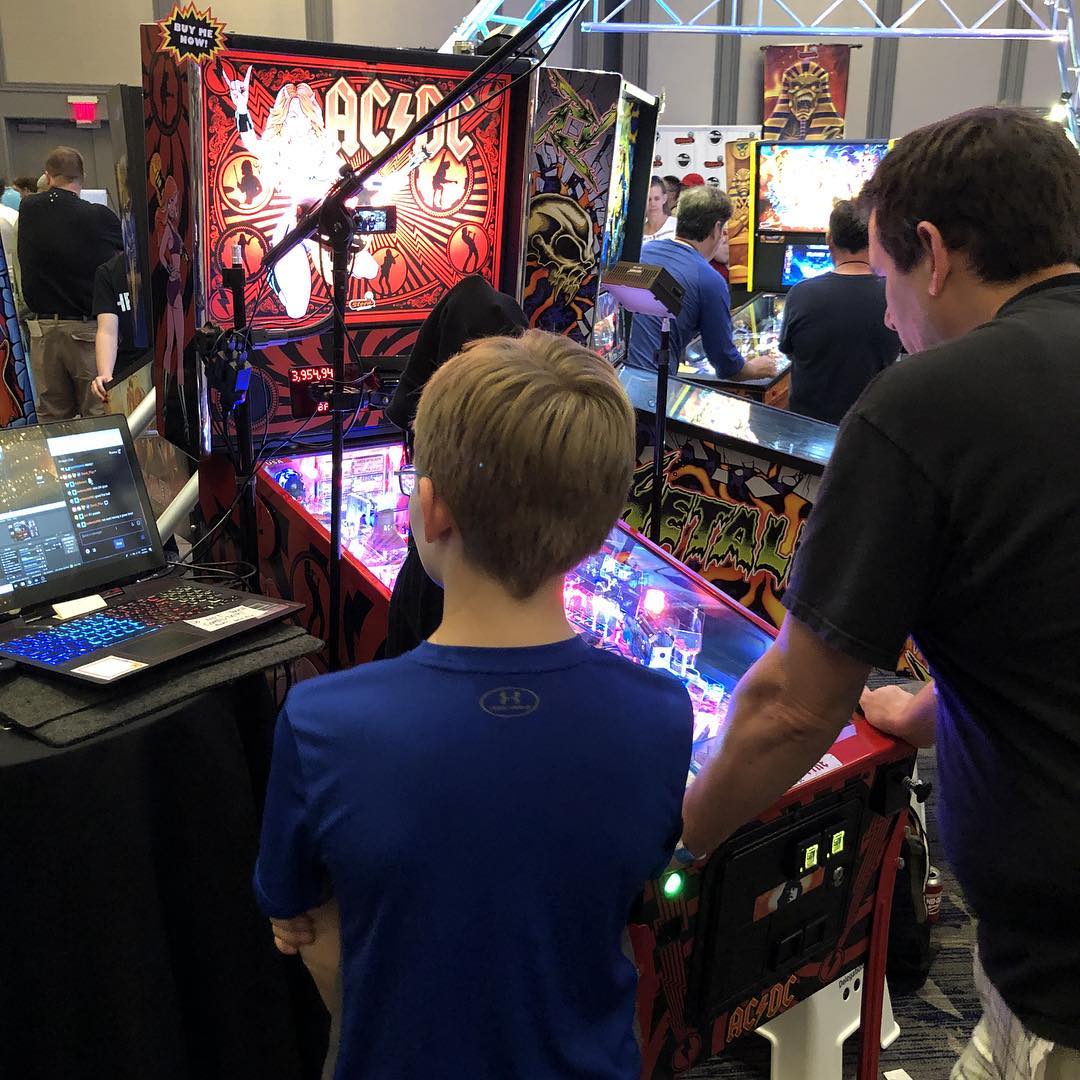
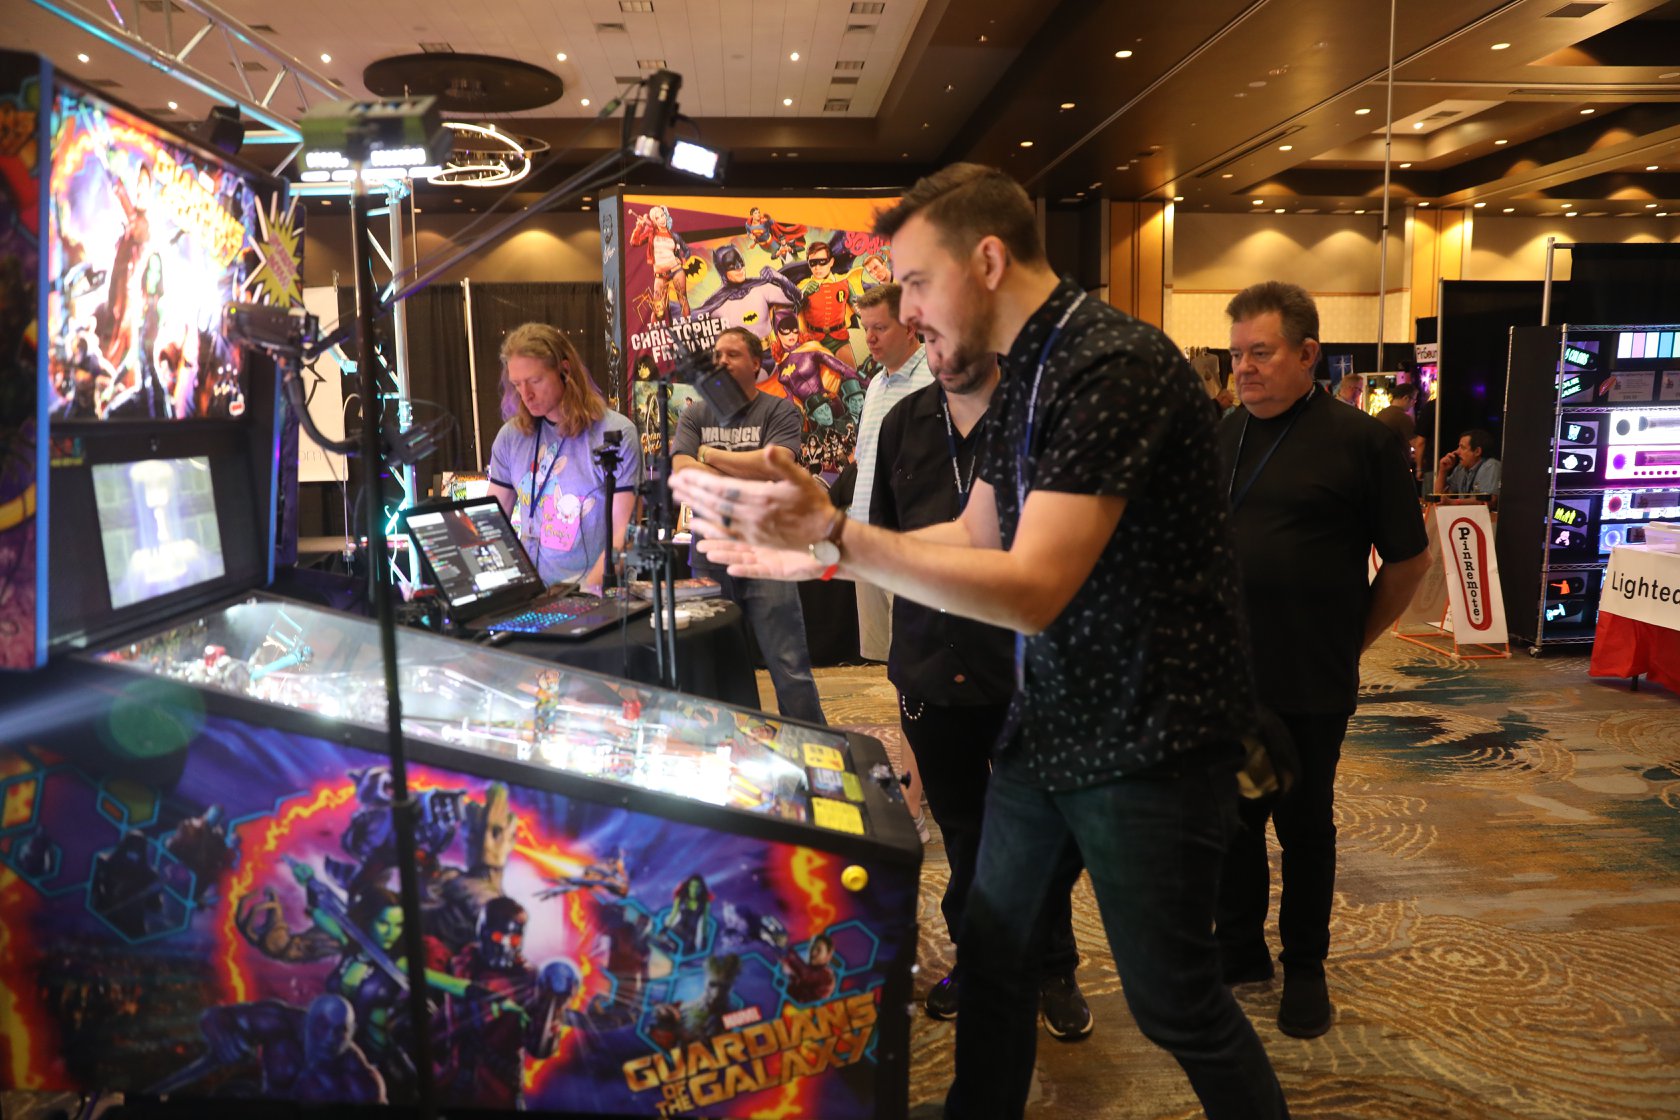
Streaming on location is a fricken blast! Strangers walking by wondering whats going on turn into folks you get to battle, or instruct on how to play! If approached correctly, location streaming will be the most fun you have streaming pinball, period!
First and foremost, to stream on location somewhere, you need to contact the establishment and ask permission. Be upfront with the fact that you will be broadcasting and recording. A good angle to approach this is a sponsorship for exposure. You tell people how rad the bar is, maybe use their logo on-screen, in return you get to use their games for content.
On to the most annoying part of location streaming, the internet. Usually a location will have a WI-FI with a decent up and down, but that doesn't speak to the integrity of the signal. You could notice that the speed-test shows a whopping 15mbps up, but that signal may be choppy and cause you to drop frames, freeze, or kill the stream all-together.
You need to have an internet backup plan. Pretty much 80% of the places I stream on location have crap internet for streaming. That's why I have a mobile hot-spot. I pay for a Verizon Jet-pack to stream off of in those situations. To make sure my bill isn't absolutely out of control, I stream at a much lower bit-rate, so that I'm not consuming as much data. Around 1000-1500. Unlimited plans are sketchy if you plan to use more than 15-20 gigs (Which you will if you stream off it more than 2-3 times a month) since all plans throttle you after a data cap which means no good streaming internet at all.
Since you'll be on location, recording and streaming around the public, you need to make them aware that you are doing so. Maybe a sign on the door that says you're recording, or simply a sign on the games that says you're broadcasting. Let people know. There is potential for legal recourse about recording people unknowingly for a broadcast. Take this as loose or as seriously as you want. It's your butt.
IMPORTANT NOTES
Lighting

I still cannot emphasize how important it is that you externally light your game.
No extra lighting will result in poor gain, the camera working too hard to maintain a quality picture, and game flashers wreaking havoc on your camera.
Playing with angles of lights is the only way to get good at lighting your games.
Find what works for you, doesn't offer extra glare to the glass, and helps eat any existing glare.
If you encounter bad overhead glare from another light source aka ceiling lights, etc. and you cant turn those lights off, your best way to fight that glare is by using extreme overhead camera angles until the glare is not on screen.
INTERNET BANDWIDTH
A quick rule of thumb that was taught to me for knowing if my internet will let me stream or not is, 2 up and you're golden. Meaning the bare minimum for a decent looking stream is an upload of 2mbps. At that low of an upload, you will have to reduce your bit-rate to something in the 1000-1500 range, but if you make sure the stream looks sexy, the bit-rate drop wont be as apparent.
USB BANDWIDTH
Here is one of the bigger hurdles in Pinball streaming. Your USB ports can only withstand so much data/power going through them, that it may cause your gear to start acting up, or stop working altogether.
For instance, a USB hub plugged into a port on your computer may have several slots to add peripherals, but that doesn't mean it can handle that many. One USB mic, and 2 Logitech C920's both running at about 720p or less resolution should work just fine since the cams are only 30FPS. Not too much data going through. BUT 2 Logitech C922's into a single hub will result in one or both cameras not working at all since those cams are a little more intense, and require more room to breathe.
If you NEED more cameras plugged into a USB hub, you aren't out of luck. Just reduce the resolution of each camera until the data throughput isn't as intense, and they all should work. For instance, you can have several cameras running off one hub if they all sit at 800x448 resolution.
If a camera isn't working correctly when you plug it in, drop the resolution to a lower 16:9 size to check if it's a bandwidth problem!
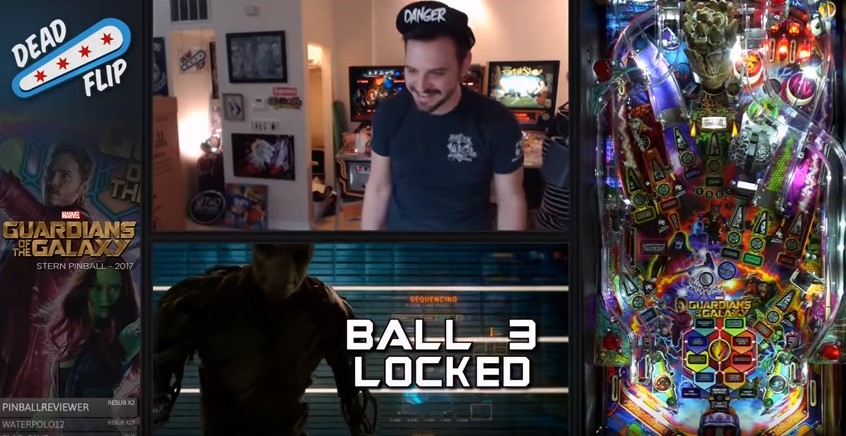
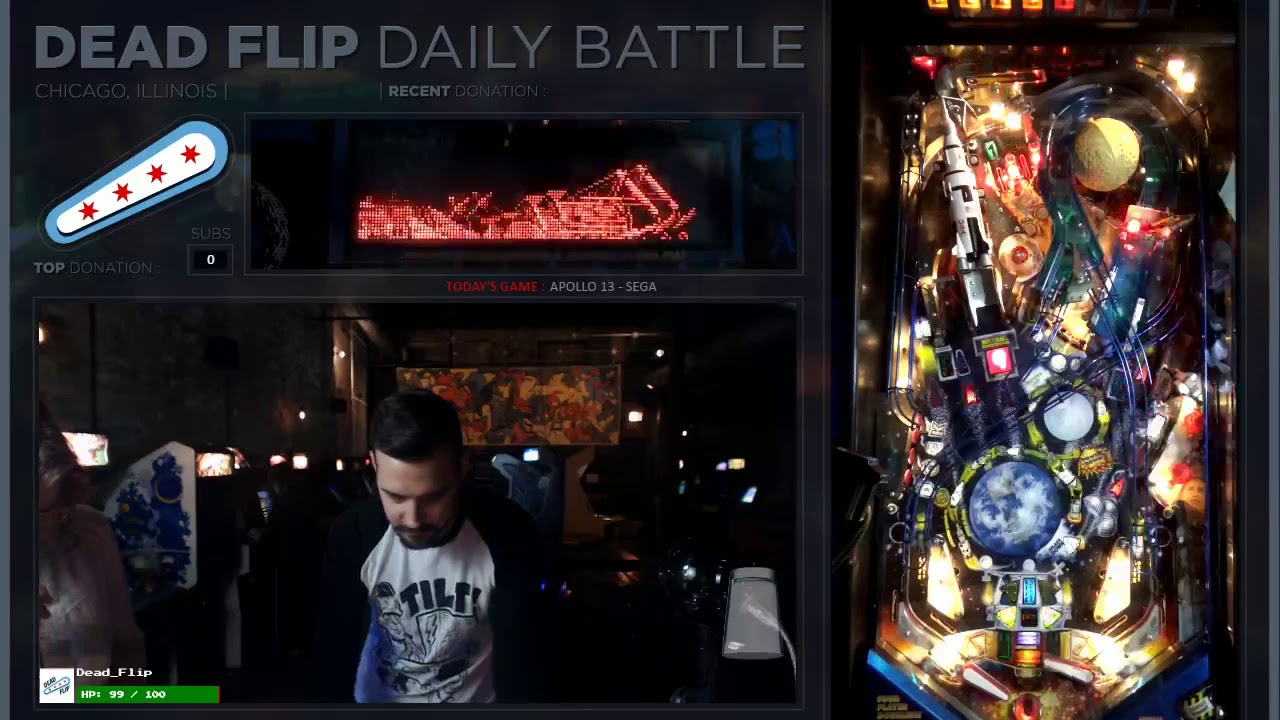
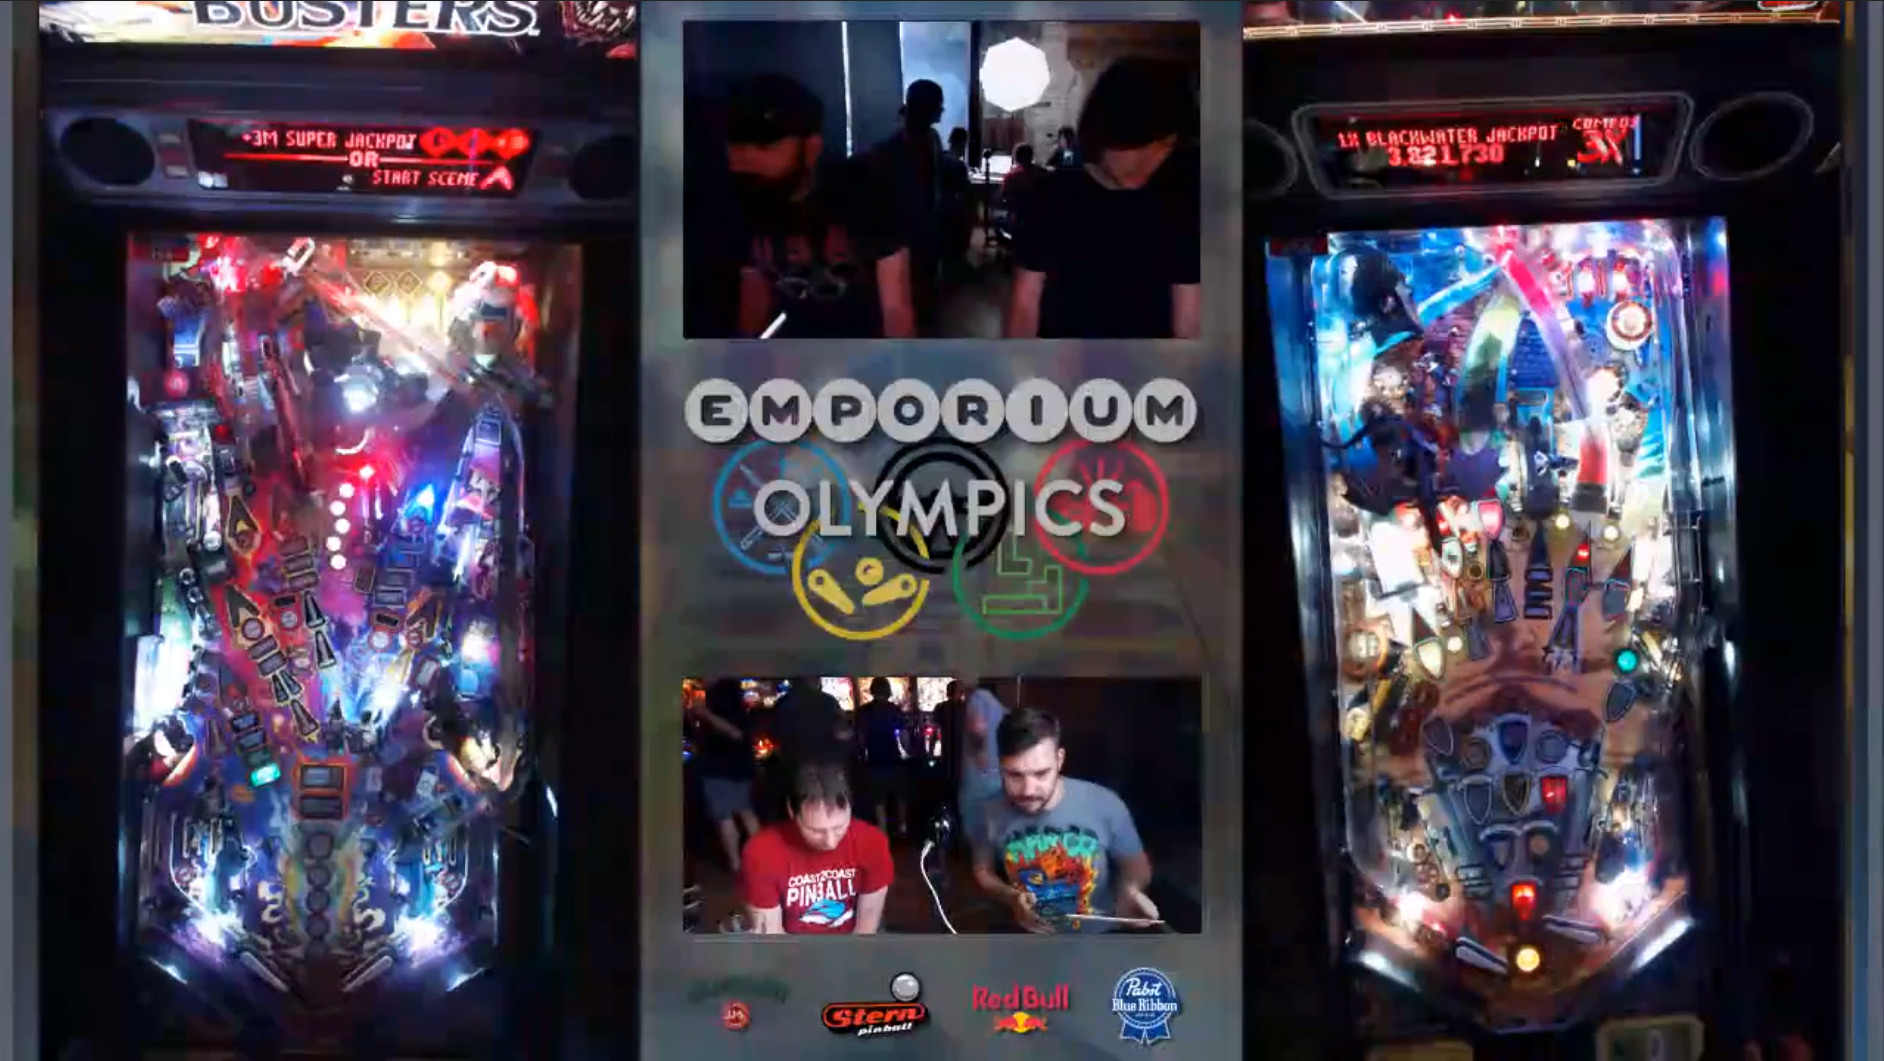

STREAM LAYOUT
Once you have all your camera and mic settings conquered, your next step is making the presentation of your cameras as appealing looking as possible. To the right you'll see various layouts I've used over the years, including a shot or two of using a single camera to capture both the playfield and the score. (Great for a low budget rig)
I also have supplied my current layout for you to use to help you get going asap! All you have to do is add your own logo, and throw some notifications over it!
"CHain of command" webcam bug
When working with webcams, fine-tuning your white balance/gain/exposure is what sets an "ok" looking stream apart from an "amazing" looking stream. This can be a little frustrating when you first plug in all your cameras and try to color correct. Sometimes the camera you're trying to adjust is not the camera being adjusted. The way around the "Chain of command" bug I like to call it is as such.
First, plug in all 3 of your webcams, and open your streaming software.
Create a layout that allows you to see all 3 camera feeds at one time.
Open the settings on any of the cameras, and start to move the "saturation" setting around.
(Or any setting that allows you to see a drastic change in the camera.)
Whichever camera is visibly changing, unplug that camera and take note that it is the "King"
Repeat that process and take note of the next camera changing. Unplug and note that it's the "Queen"
Now, with the last camera still plugged in, go ahead and color correct that camera to your liking.
Next, Plug in the "Queen" and color correct that.
Finally, plug in the "King" and color correct that camera as well.
That's the work-around for the "Chain of command" bug. (Until Logitech updates it's software)
There is a piece of old javascript that let's you manipulate multiples of the same make/model webcam, that I used for years.
Here is the original thread pointing to version 2 (That I used). This saved me big time once I started adding more webcams!
https://obsproject.com/forum/threads/using-2-or-more-logitech-c920s-or-c930es-together-successfully.26707/
It looks like there is an update to the software, but I only endorse the version 2, have not used version 3 so use at your own risk.
https://github.com/quekky/AdvancedCameraSettings_r3
FIXING YOUR WEBCAM QUALITY
Webcam Video Format Fix
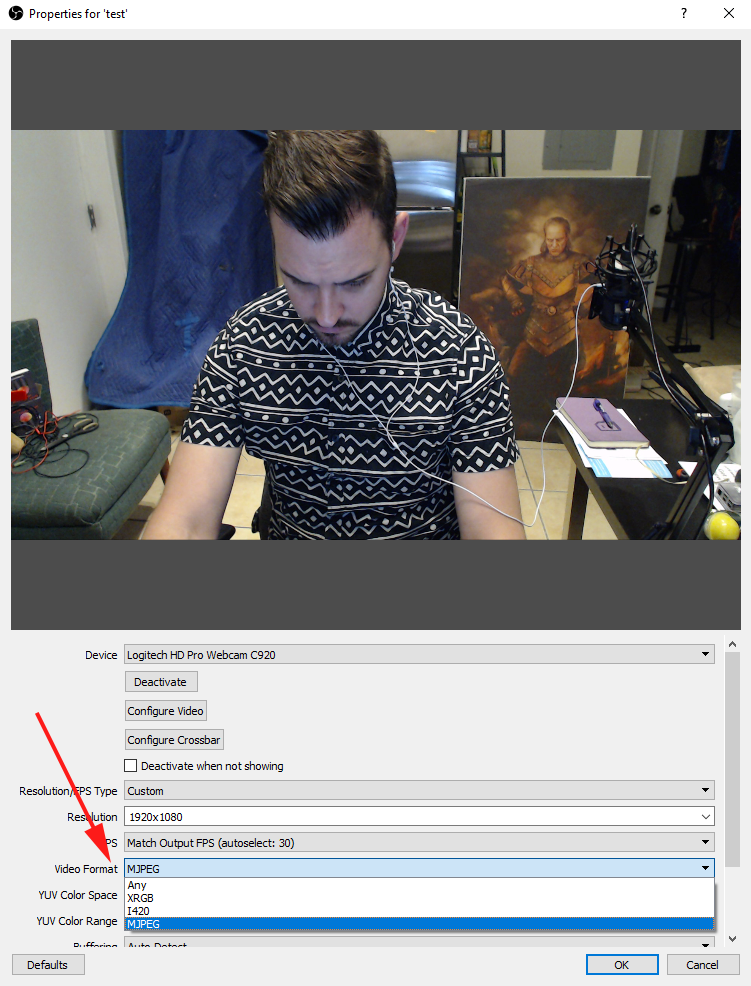
If your webcam is still being fussy with it's quality after doing the above settings, one last thing you can try that is usually the icing on the cake for making things work, is to force the video format.
Click your video format settings drop-down on your camera, and choose "MJPEG", you should have a brief freeze in your video, and then an immediate quality upgrade.
In Xsplit this option is found in the "Configure Manually" drop-down, and going to "Video Output". The option you're looking for here is under the "Color Space/ Compression" drop-down.
"MJPEG" usually works for me, but if another option in there works better for ya, go for it!
Logitech c920 Software
The above video shows us using a Logitech C922, but if you happen to be using a C920, your setting popup will be a bit different since it forces you to use Logitech's settings window. Below are the settings you want to turn off, highlighted by a red arrow. White balance can be left on since this is optional. Now all you have to do is tweak your exposure down a bit, and dial in the rest with the gain slider!

